10 Tips for Taking Great iPhone Photos

Northern Belle Hat Company at Penns Woods Winery. Photo: SarahLockard.com
All professional photos featured on this page (and this website) were taken with my personal iPhone, my passion for photography and my heart.
1. Clean Your Lenses
Most of the poor quality images I see on social media platforms are because a person is shooting with an iPhone that has a very dirty lense. This is something you should be absolutely meticulous about—I mean obsessive. Always check your lenses for smudges and wipe them off regularly with a dry, clean eyeglass-grade lens cloth. I carry a few with me in a small case. Remember our iPhones are extremely sensitive to moisture so do not use traditional electronic cleaning wipes on your phone lenses. If you are shooting food or a chef, be extra diligent about cleaning your lenses because food residue gets everywhere very easily.
2. Use Your iPhone Filters
Did you know your iPhone is loaded with awesome filters that will absolutely enhance your photo game? Did you even know these valuable filters exist? Well, I am here to help you. Easy peasy, lemon squeezy. Here are the steps.
Click on the photo icon on your iPhone.
Look for the upward facing yellow arrow at the very top of your phone screen.
Click on the arrow so it is now facing in the downward direction
Look at the bottom of your phone screen now. You will now see the various editing tools that are at your fingertips.
Scroll all the way to the right and the final 3 concentric circles icon. Click on it. It will default to the very far left “Original” filter.
This option features ten filters for your images. Get acquainted and test out each one.
I would say 9 times out of 10 I prefer to shoot on the Vivid filter. It enhances the color of my photo without compromising the true aesthetic of what I’m capturing—and brightly colored images trend on social higher. That is a fact. I get asked all the time if I am using third party photo editing apps. The answer is no. The magic is already in my heart…and in my hands.

Shot on iPhone 14 pro max Vivid Filter (my fav) with additional adjustments: small edits using brightness and black point filters. Photo: Penns Woods Winery/Derby at the Vineyard
3. Avoid an Over-Editing Mindset
When you are taking your iPhone photos, take a pause to frame the photo correctly. This has a lot to do with the distance between you and the object(s) you are capturing. Very often I see photos where people are just way too far away from people or objects—most especially in sub-par food photography.
Cropping and editing the dimensions of your original photo is rarely a good idea-it compromises the integrity of the image and is evident when it is published. Your photos tell a story. If you are constantly tweaking, cropping and zooming in on your photos before using/publishing them, then you aren’t taking a good picture to begin with. Fact. Get the OG image framed correctly and you will be good to go. Over-editing will take attention away from the integrity of your photo and, most likely, reduce image quality.
No amount of editing can turn a bad photo into a good one. So be focused on taking good photos that are sharp, from the start, and correctly framed before you even think about editing them.

A perfectly placed cocktail with a moody bar in the background doesn't need any fiddling or cropping when it is taken correctly-saving you time and delivering a more authentic photo. Bada Bing, Bada Boom! Photo: La Sponda, Downingtown Photography: SarahLockard.com
4. Master Background & Foreground
Backgrounds and foregrounds are kindred spirits in photography. So it is in your best interest to be aware of your background when you are taking photos. There’s a lot going on in this brunch photo below—because the toast itself cannot stand on its own and does not have a lot of color and contrast. So I brought in a big glass of OJ to pop the color of the egg yolk, added the menu, and worked in the texture of the wall and seating area. This is a perfect marriage of background and foreground working together to deliver an outstanding photo. Also I got just above eye level with the toast, which I will talk about in the next tip, lol. Hard to believe this was shot with my iPhone…but it was.
You do not need 4-5 elements to make an average photo into a great one. However, understanding how your background and foreground relationship is working is important.

Brunch goals at Bella Trattoria, Spring City. Photo: SarahLockard.com
5. Work in Angles
You should not always be shooting standing straight up from your eye level. In fact, the majority of the time you should not shoot straight on. I saw a woman a few weeks ago taking a great, low photo of her dog in front of her storefront—she basically got on her stomach to get the angle. It reminded me that objects that are low to the ground (animals, kiddos) can be shot this way and it really adds to the photo quality and perspective. So crouch down, use a small step ladder, hold your iPhone 6 inches above your head, find a step or elevated surface (even a hill works) to get a higher quality photo. Just do not shoot people or adults from a low angle. That is my pet peeve and somehow married to millennials. lol.

Sexy car hood at Wheels of Wayne with a well framed couple in the background. Photography: SarahLockard.com
6. Find Funky Shadows
I originally had tip #6 here pegged for “Natural Light is Your BFF,” but I decided to take this one step further and talk about practice. LOL. Just kidding. We are talkin’ ‘bout shadows here—which actually do take a ton of practice to master with photography.
Just like you want to be cognizant of your background, you should always be aware of shadows. They can add texture, illumination, contrast and depth to your images. Shadows come in all ‘shapes and sizes’ from your own personal shadow in the sand on the beach to a reflection on the floor from a window blind.
The chicken coop at Valley Forge Park is one of the coolest places to play with shadows (behind Knox Quarters barn off of Route 23 parking lot). I have been inside here at 7am, 330pm and early evening throughout all four seasons and the light really dances on its own. In the first image below to the left, I decided not to dodge the shadows in the coop (as I had done the three previous times) and embrace a pattern on my model’s face to add visual interest.
Shadow photography is one of my niches and I love it because it delivers texture, contrast and elevated composition. Give it a try!


7. Don’t Get Married to Vertical Images
It is easy to get into autopilot and shoot most of your images in vertical—happens to me. Because Instagram reels and stories lend better to vertical content, this is a common habit that can compromise some of your best iPhone photography. Keep in mind when you are shooting to take most images in horizontal as well, especially group photos of 3 or more people.

The perfectly framed, fall, horizontal photo of Pete's Produce Farm--with a cloud puff cooperating as the perfect detail from Mother Nature. Photography: SarahLockard.com
8. Have Unapologetic Fun!
One thing you can never edit is energy. But how can you achieve that in your photos? Make your subject your absolute priority and only mental commitment. Bring a focused and fun approach to your photos with some creative concepts already in mind. This will translate to some outstanding moments. I am fully committed and connected to my subjects when I am on a photo shoot. Whether with a family, capturing an event or working with a chef on their cuisine, my mind is centered and I am not on social media.
When you are focused and connecting with the people you are capturing, that will come across in the final product. Have you ever seen a wedding photographer checking text messages? Probably not. Have the same mindset to your photography. Magical moments will happen and you will be there to capture them. As we say in yoga “If you aren’t here, you are nowhere.”

Hand on the hip and a little sass go a long way! Ladies Day at The Devon Horse Show and Country Fair Photography: SarahLockard.com
9. Embrace “Outtakes” as the Final Product.
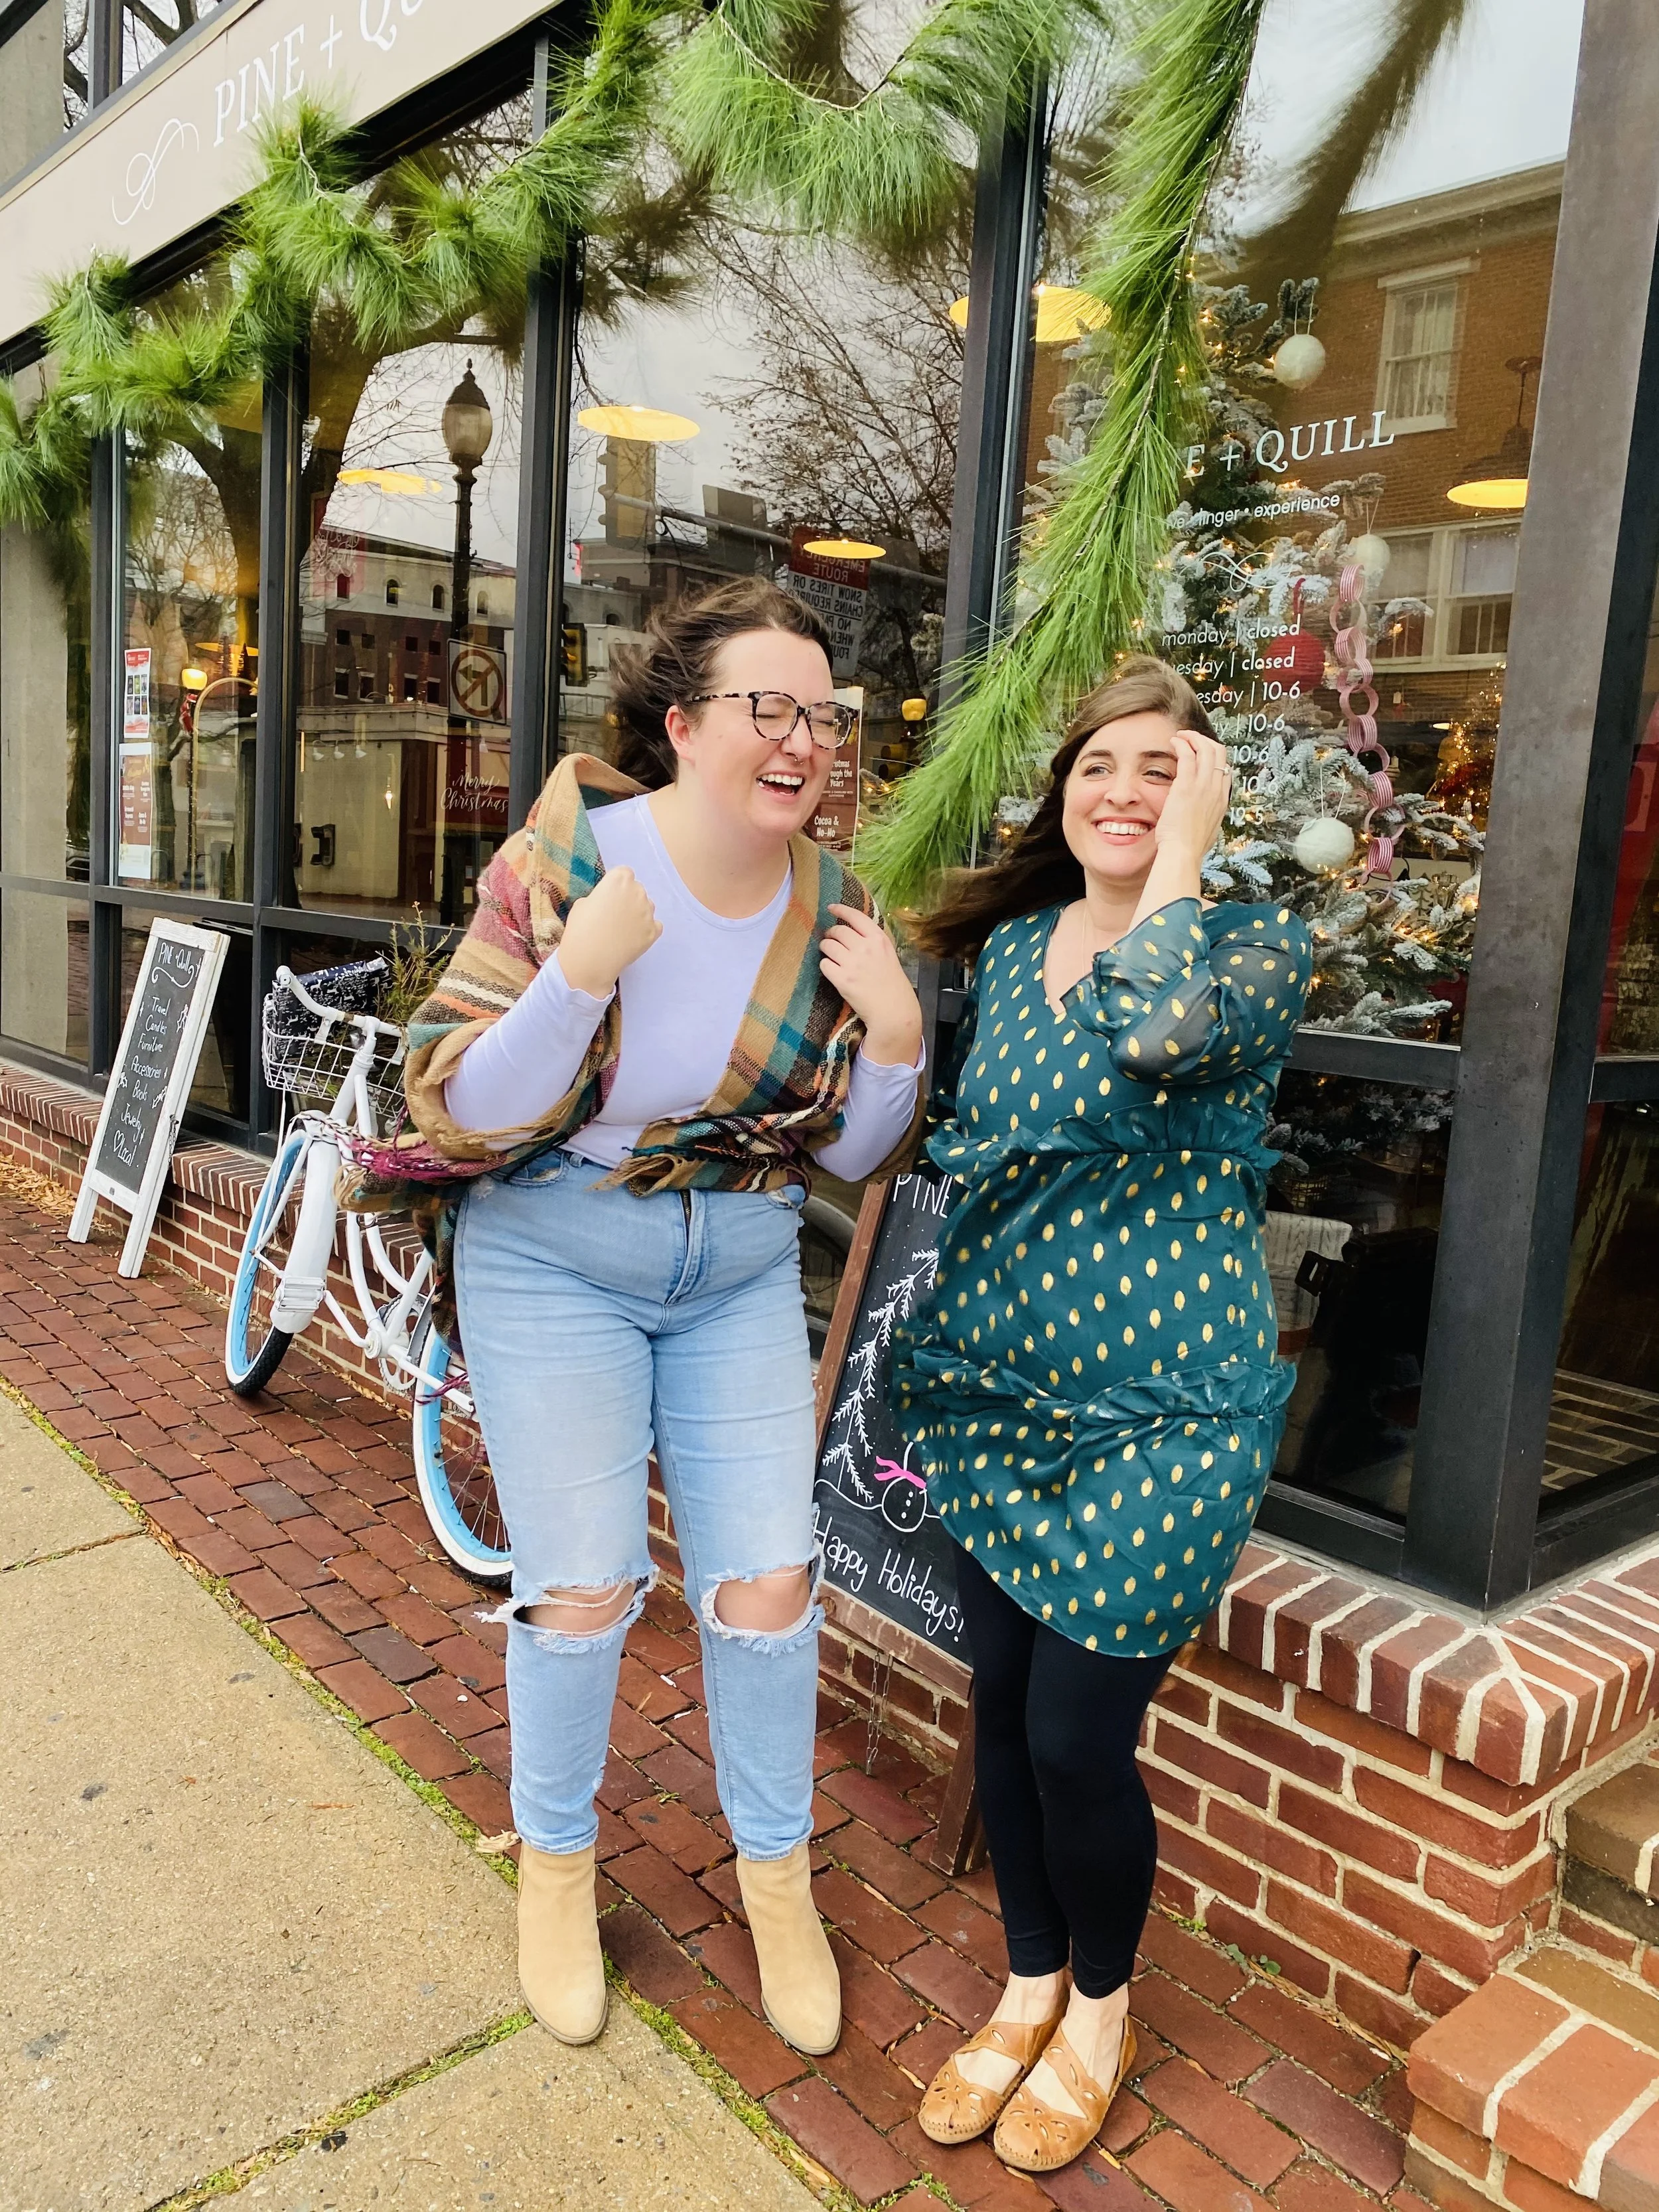
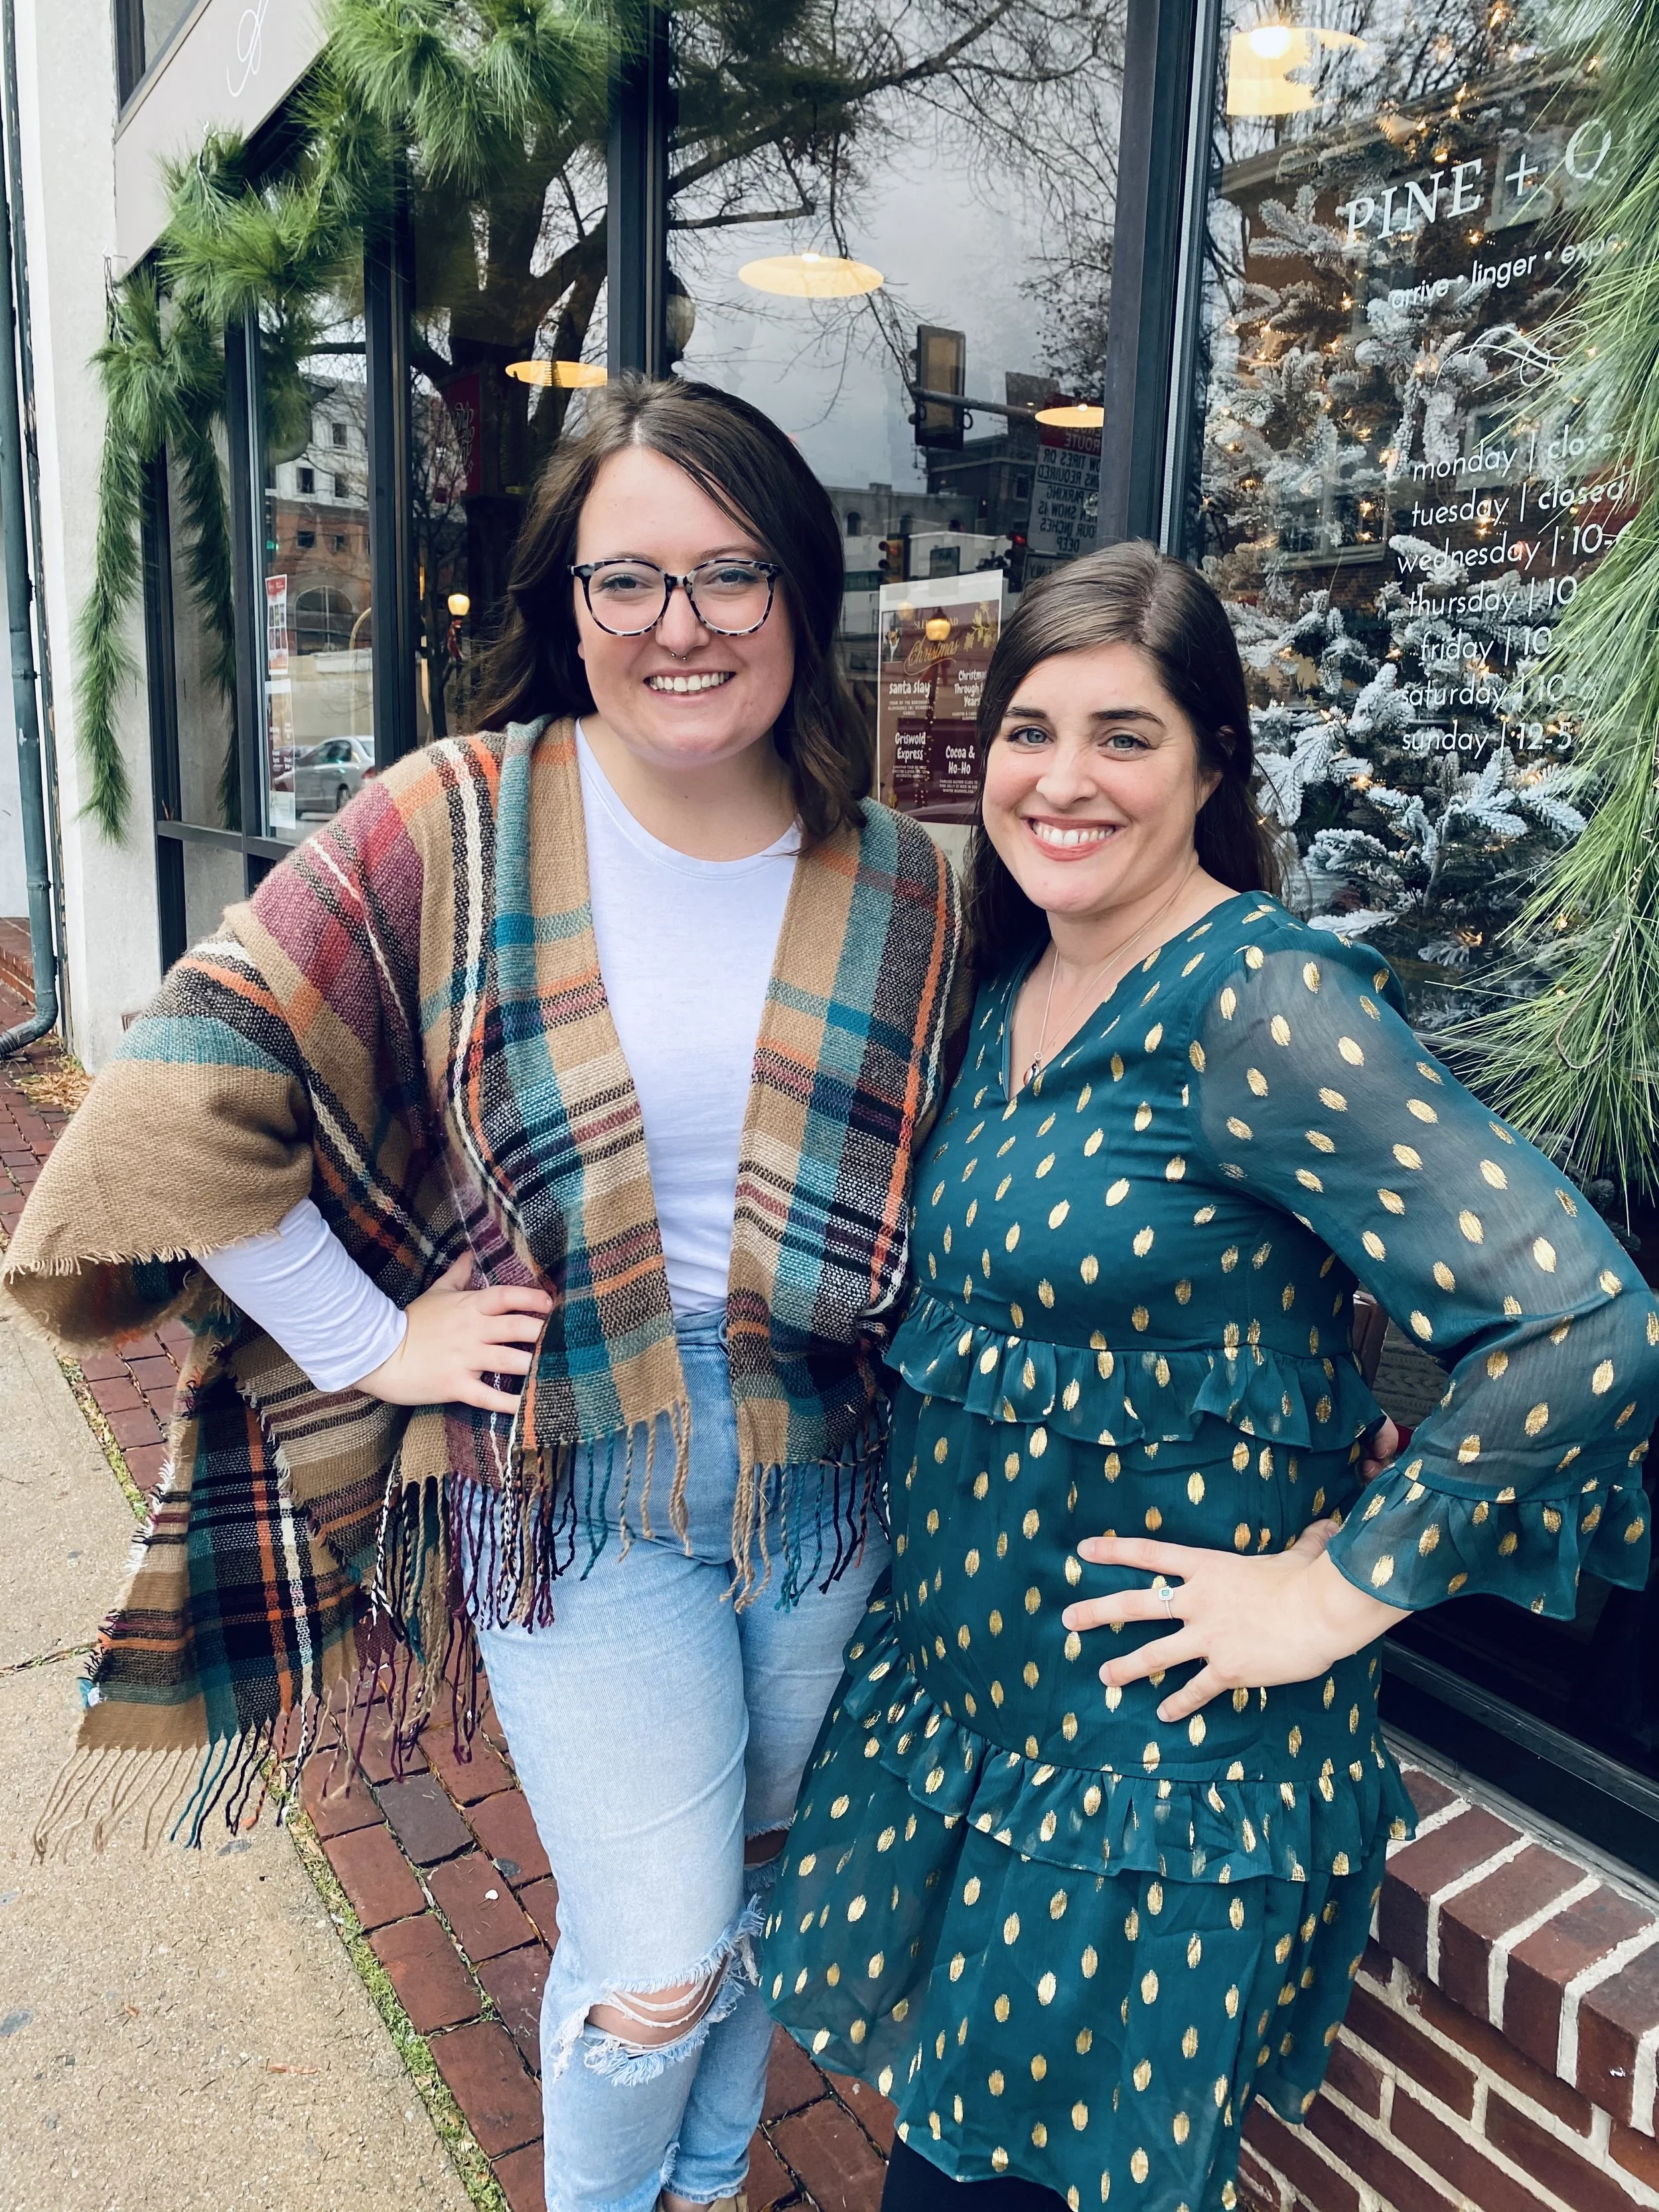
Sh*t happens. And that couldn’t be more relevant than when I am on a photo shoot. My approach to all my photography is to roll with and embrace what comes my way. Don’t stop shooting when things go astray—in fact make sure your settings are always on live and fire away. In this gallery below, an unexpected December wind gust hit just as I was posing the shop owners outside in downtown West Chester. The end results still makes me smile!

10. Find Something Demonstrative that Speaks for Itself
The devil is in the detail…as they say. And that could not be more true when crafting a terrific photo. When you approach your photography with a creative mind, you will be able to look at elements that set a moment apart as opposed to being in auto-mode and just taking the photo as you originally see it. In this case, I was at a Halloween parade and found a family repping the Wizard of Oz. I got some really cute photos of them together—but I decided to take this shot below and use it on an Instagram story. It was phenomenally popular. After all, the dreams that you dare to dream really do come true.

There's no place like home. Linvilla Orchards Halloween Parade, Fall 2021
Photography: SarahLockard.com
Click here to view my family & lifestyle photography.
Click here to view my business photography.
Thanks for stopping by my blog. Lots more to come this Fall 2024 that I know you will just love!